My favorite baking projects are ones where the work is minimal, the stages are spread out, and the time table is flexible. These yeasted English muffins are the perfect example. With no kneading, and two slow rises these English muffins have a complex flavor and are ready when you want them. Make them ahead of time for brunch, use them for egg sandwiches, or keep them all for yourself.
Notes
Note about rye flour
This is not going to give you rye flavored English muffins. Instead, the bit of rye flour will give your muffins a bit more chew and interest. My kids didn’t register the “healthy” flour but preferred these muffins to “plain” ones. (The high fiber is a bonus). My preferred rye flour for these is King Arthur’s pumpernickel flour, but any coarse rye or whole wheat flour should work.
Note about timing
I like to start these English muffins the morning before I want them. Making the dough takes about 5 minutes and then it just rise. In the evening, I’ll portion the dough into individual muffins (this takes about 10 minutes) and put them in the fridge to rise until the next morning. This dough is so forgiving, I have forgotten it and it was still amazing an extra day later.
Key Ingredients
bread flour
rye or whole wheat flour
rapid rise yeast
butter
2% milk
Yeasted Easy English Muffins – Recipe
Active time: 30 minutes: 5 min. to make the dough. 10 min. to portion the dough into muffins. 20 min. to cook. Resting time: 24-28 hours. Adapted from Stella Park’s No-Knead English Muffins (Brave Tart).
Ingredients
- 3 cups (400 grams) bread flour I used King Arthur
- 2/3 cup (80 grams) course rye flour (pumpernickel) or whole wheat flour
- 2 tablespoons granulated sugar
- 1 teaspoon fine sea salt
- 1 teaspoon instant dry yeast
- 2 cups 2% milk
- 4 tablespoons unsalted butter, melted
- 1 cup cornmeal or semolina flour (coarse is fantastic, but any will do)
- 3 tablespoons salted butter for frying
Step One
Make Dough: Measure flours, sugar, salt, and yeast into a large mixing bowl and stir to combine. Pour melted butter and milk over the dry ingredients. Stir until completely combined. Cover the bowl with plastic wrap and let sit on the counter until dough begins to puff up 1-2 hours. Then put dough in the fridge and allow to rise for another 8-12 hours. (Or for a longer rise, place dough directly in the fridge, without resting on the counter first, and allow to rise for 18-24 hours).
Step Two
Make English Muffins: Line a rimmed baking sheet with parchment paper. Sprinkle ¾ cup cornmeal (or other coarse) flour over the tray to completely cover. The dough is going to be sticky, so wet your hands. Then, gently pull off about 1/3-1/2 of a cup of dough (just under 100grams) and gently shape it into a blob/pancake and place the blob on the parchment. Repeat with the rest of the dough, just get your hands a bit damp anytime the dough starts to stick. Make 12 balls and space them out across the parchment leaving at least an inch between the for rise. Sprinkle about ¼ cup of cornmeal/coarse flour over top of the muffins. Cover tray with plastic wrap making sure to cover all of the dough blobs so that the dough does not dry out. Put tray in the fridge and allow to rise for 6-24 hours.

Step Three
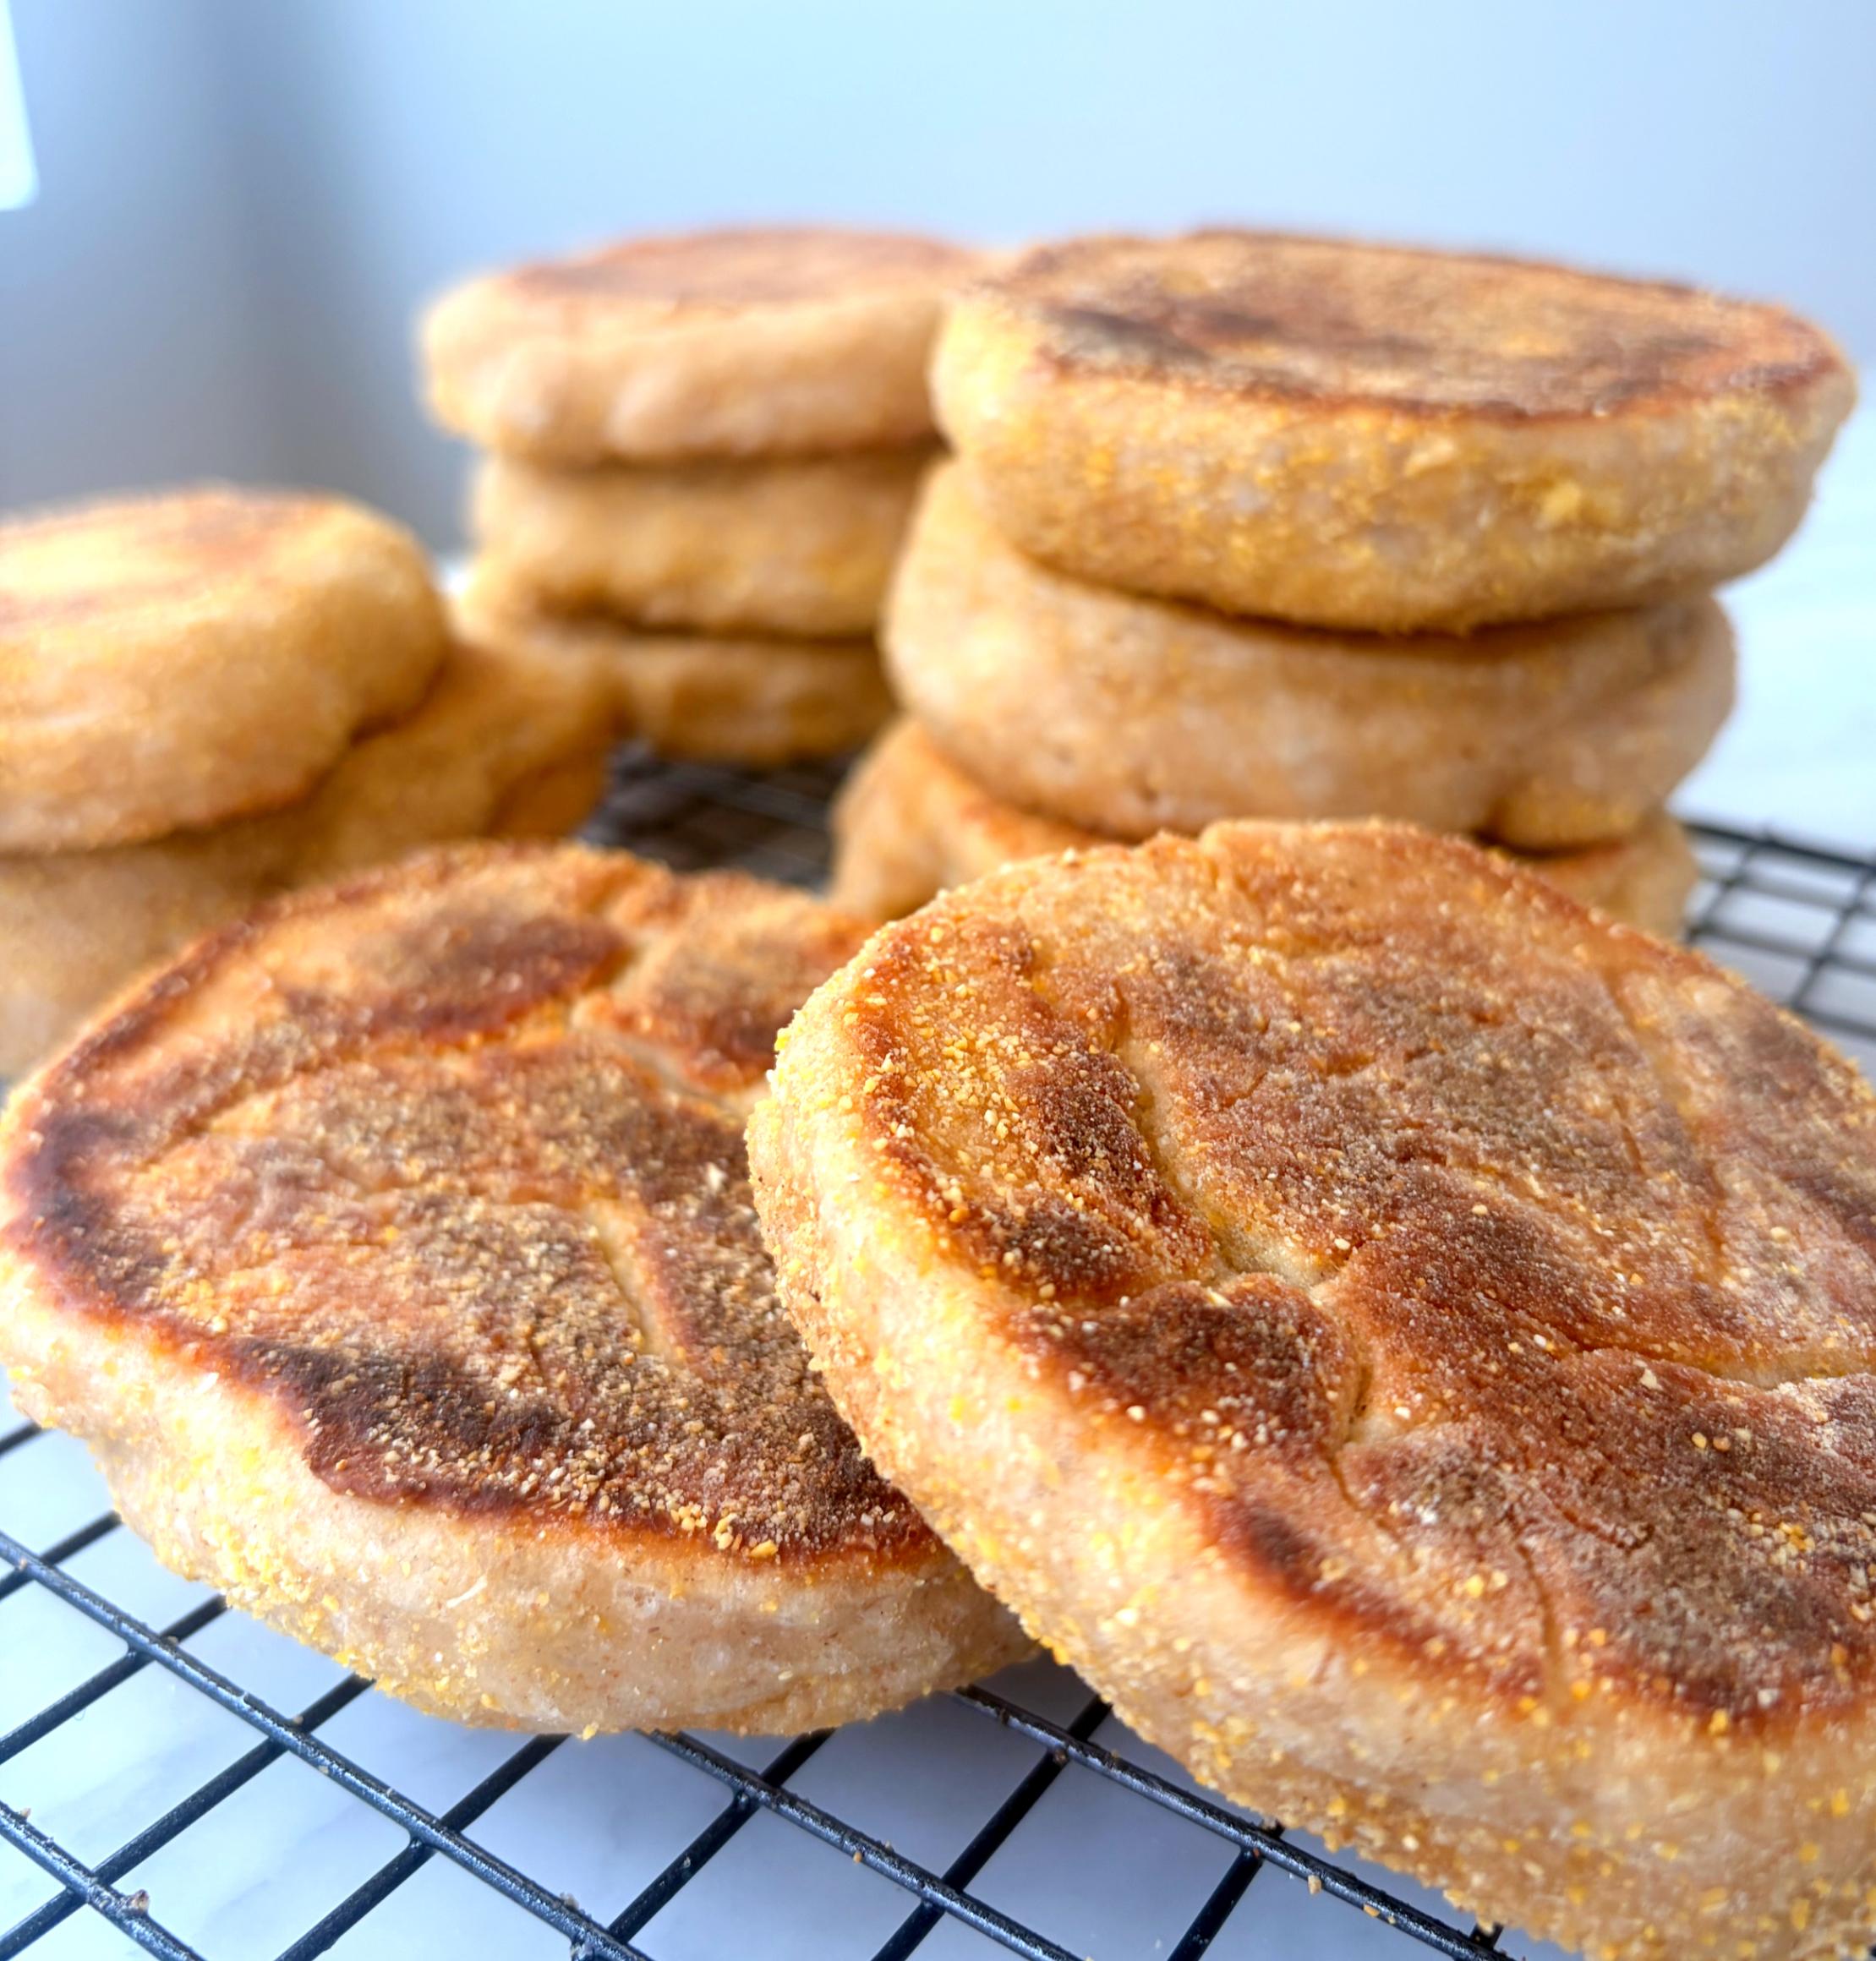
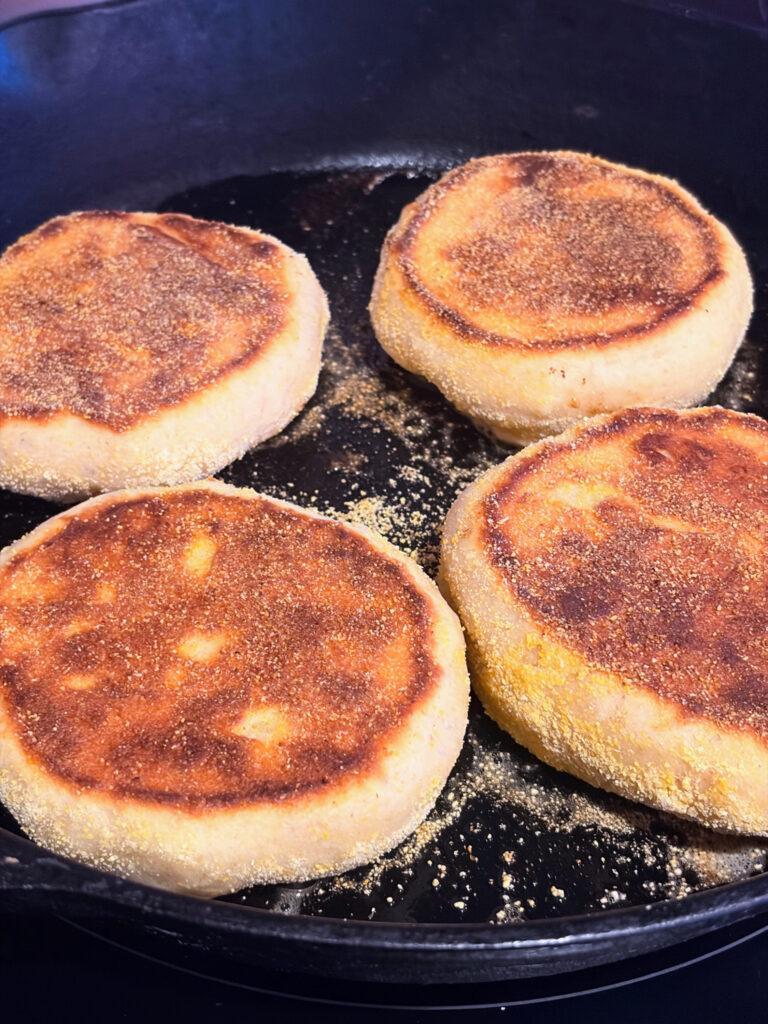
Cook Muffins: Remove the pan with the English muffin dough balls from the fridge. Heat a cast iron pan or griddle over medium heat. When hot, lightly grease pan with salted butter and then add the English muffins to the pan. Make sure that they don’t touch. (My pan allows me to cook 4 at a time). Cook about 6-8 minutes until the first side is a deep golden brown (adjusting heat as necessary). Then, brush the tops of the muffins with more salted butter (or, my lazy method: break up 4 pats cold butter into 2-3 pieces and place 2-3 pieces on top of each of the muffins) and flip them over. Cook another 4 minutes until the second side is golden. If you have a digital thermometer, the middle of the muffins should be about 200-210 degrees.
You can use a fork to gently pry the English muffins in half and eat them immediately (they’ll be soft and steamy, and insanely good). Or, for longest shelf-life, place them on a wire rack to cool. Then store them in an airtight container for about 4 days on the counter or a few weeks in the fridge. I assume they would freeze just fine, but I haven’t tried yet.